
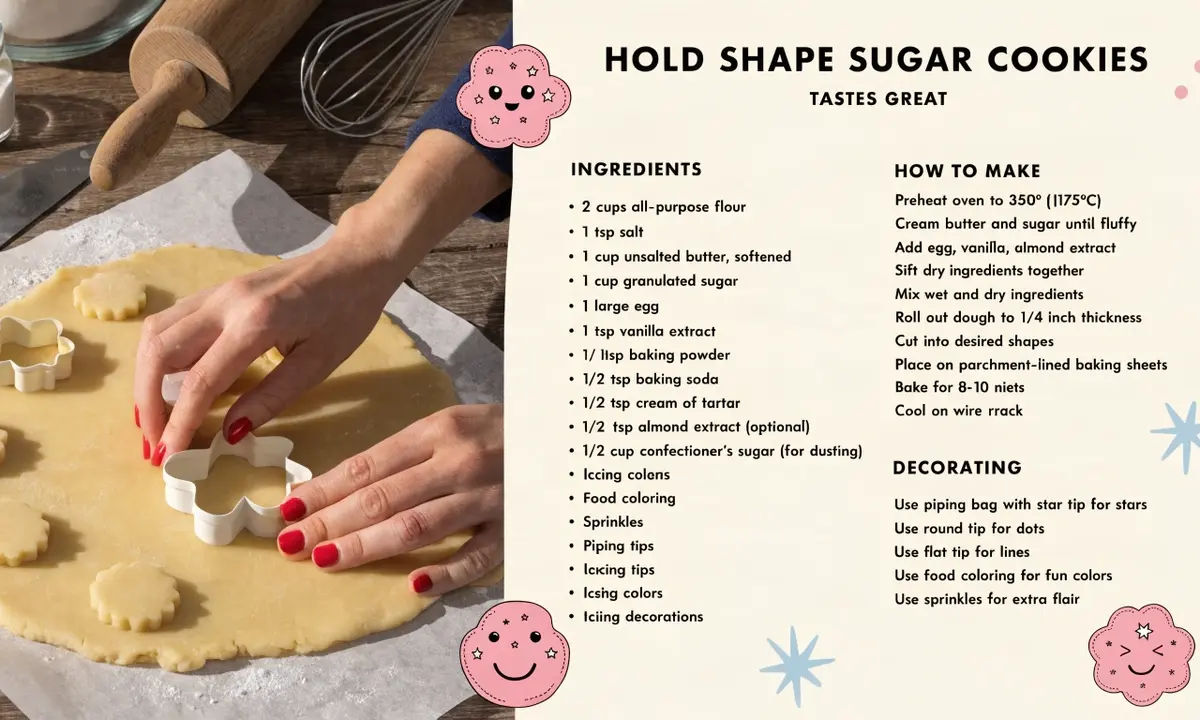
The decorated sugar cookie is the most technically demanding cookie on the holiday tray — not because the dough is complicated, but because it has to do two things simultaneously that are almost contradictory. It has to hold a precise cut shape during baking without puffing, spreading, or losing detail. And it has to taste good enough to justify the effort — not just sweet, not just a vehicle for icing, but genuinely delicious on its own.
Most sugar cookie recipes optimize for one or the other. Structural recipes that hold their shape perfectly taste like sweetened cardboard. Delicious recipes that taste buttery and complex spread into blobs that bear no resemblance to the cutter that made them. This recipe solves both problems: brown butter for flavor depth, cream cheese for tenderness without spread, and a precise flour ratio that keeps the cookie exactly where you put it on the pan.
According to Serious Eats’ exhaustive sugar cookie testing, the single most effective technique for maintaining cut-out shape is chilling the shaped cookies on the pan for 15 minutes before baking — not just chilling the dough, but chilling the already-cut shapes. This re-solidifies the butter after the warmth of rolling and allows the edges to set sharply in the first minutes of baking before any spread can occur. This guide applies that principle and explains why it works.
This article is part of the seasonal cookie flavors guide and connects directly to the 10 gourmet Christmas cookie flavors overview where this recipe is introduced.
The two problems this recipe solves
Shape retention: Cream cheese in the dough tightens the crumb and reduces spread; chilling shaped cookies before baking sets the edges before butter melts. Flavor: Brown butter adds nutty, caramel depth; vanilla bean paste and a half teaspoon of almond extract create the characteristic sugar cookie flavor that tastes like an actual bakery, not a grocery store shelf.
The Recipe
Ingredients — Makes 18–24 medium cookies or 12–14 large
Cookie dough
- 225g (1 cup / 2 sticks) unsalted butter
- 115g (4 oz) full-fat block cream cheese, room temp
- 200g (1 cup) granulated sugar
- 1 large egg, room temperature
- 1½ tsp vanilla bean paste or pure vanilla extract
- ½ tsp pure almond extract
- 420g (3½ cups) all-purpose flour, plus more for rolling
- 1 tsp baking powder
- ½ tsp fine sea salt
Royal icing (for decorating)
- 450g (3¾ cups) powdered sugar, sifted
- 3 tbsp meringue powder
- 6–8 tbsp warm water
- Gel food coloring (not liquid — it dilutes too much)
- ½ tsp pure vanilla or almond extract (optional)
Equipment for decorating
- Piping bags + #1 or #2 round tips (outlining)
- Squeeze bottles or piping bags for flooding
- Toothpicks or scribe tool for detail work
- Cookie cutters in desired shapes
Method — Cookie Dough
1-Brown the butter and cool
Melt butter in a light-colored saucepan over medium heat, stirring frequently. Cook 4–6 minutes until the milk solids turn golden and the butter smells nutty and caramel-like. Pour immediately into a large mixing bowl. Cool to room temperature — this takes about 45 minutes at room temperature or 20 minutes in the refrigerator, stirring occasionally. The butter must be completely solid again before proceeding; if it is still liquid, the dough will not come together correctly.
2-Cream brown butter, cream cheese, and sugar
Beat re-solidified brown butter with room-temperature cream cheese on medium speed until smooth and combined, about 2 minutes. Add granulated sugar and beat on medium-high for 3 minutes until lightened and fluffy. The cream cheese will not cream as dramatically as butter alone — the mixture will look smooth and pale rather than dramatically increased in volume. This is correct.
3-Add egg and extracts
Add the egg and beat on medium for 30 seconds. Add vanilla bean paste and almond extract and beat briefly to combine. The almond extract is not optional for flavor — it is the ingredient that makes sugar cookies taste like sugar cookies rather than plain butter cookies. Start at ½ teaspoon; experienced bakers who love a strong almond note can go to ¾ tsp, but beyond that it reads as marzipan rather than sugar cookie.
4-Add dry ingredients
Whisk flour, baking powder, and salt together. Add to the butter mixture and mix on low until just combined. The dough will be stiff — stiffer than most cookie doughs — and should pull cleanly away from the bowl sides. If it is sticky, add flour one tablespoon at a time. If it is crumbly, add cream cheese one teaspoon at a time. Do not overmix; the dough should just come together.
5-Chill the dough — minimum 2 hours
Divide the dough into two discs (this makes it easier to roll in manageable portions), wrap tightly in plastic wrap, and refrigerate for at least 2 hours or up to 3 days. The dough needs to be thoroughly cold before rolling — warm sugar cookie dough sticks to the work surface, tears when transferred, and loses shape details when baking. Well-chilled dough rolls cleanly, cuts crisply, and lifts without distortion.
6-Roll and cut — the shape-retention technique
Preheat oven to 375°F / 190°C. On a lightly floured surface, roll one disc to 6mm (¼ inch) thickness — use rolling pin guide rings if available for consistent thickness. Cut shapes as close together as possible to minimize scraps. Transfer cut shapes to parchment-lined baking sheets using a thin offset spatula. Refrigerate the cut shapes on the pan for 15 minutes before baking. This is the critical shape-retention step — do not skip it.
7-Bake
Bake 9–11 minutes. The cookies are done when the edges are set and very lightly golden — the centers should still look pale and slightly underdone. These cookies do not develop the obvious color change of a chocolate cookie; pull them earlier than you think you need to. Overbaked sugar cookies are dry and hard within hours. Cool on the pan 5 minutes, then transfer to a wire rack to cool completely before decorating — a minimum of 30 minutes, ideally 1 hour. Any warmth will melt royal icing on contact.
8-Handle scraps correctly
Gather dough scraps, press into a disc, and refrigerate for at least 20 minutes before re-rolling. Scrap cookies — those baked from re-rolled dough — will always have a slightly tougher texture than first-roll cookies because the dough has been worked more and has developed more gluten. Keep scrap cookies separate and eat them yourself; they taste fine but are not as tender. Never roll scraps more than twice.
Royal Icing: The Decorating Medium
Royal icing is the correct decorating medium for cut-out sugar cookies because it dries to a hard, smooth finish that can be stacked, shipped, and stored without smearing. It is not the richest or most indulgent topping — that would be a thick cream cheese frosting — but for decorated cookies where appearance is part of the point, nothing else provides the same clean canvas.
Royal icing is used at two different consistencies for decorated cookies, and understanding both is essential:
Outline Consistency
Thick enough to pipe a clean line that holds its shape and does not spread. A ribbon dropped from a spoon should hold its shape for 5–10 seconds before settling back. This is your outline icing — it creates the border that flood icing will flow up to without spreading over the edge.
Approx ratio: 6 tbsp water per 450g powdered sugar
Flood Consistency
Thin enough to spread smoothly across the outlined cookie, self-leveling to a flat surface. A ribbon dropped from a spoon should melt back in 3–5 seconds. This is your fill icing — applied inside the outline using a squeeze bottle or piping bag, then spread with a toothpick to the edges.
Approx ratio: 8 tbsp water per 450g powdered sugar
Making Royal Icing
1-Sift powdered sugar into a large bowl. Add meringue powder and 6 tablespoons of warm water. Beat on medium-high with a hand or stand mixer for 5 minutes until the icing is very white, thick, and glossy. This is your base icing — outline consistency.
2-Divide into separate bowls — one for each color you plan to use. Add gel food coloring one drop at a time, stirring between each addition. Gel coloring is essential; liquid food coloring (the kind in small bottles at grocery stores) adds too much water and thins the icing unpredictably.
3-For flood icing: thin each colored batch with warm water, added ½ teaspoon at a time, until the ribbon test passes (3–5 second disappearance). Keep outline icing in piping bags and flood icing in squeeze bottles for easiest application. Cover all icing with plastic wrap pressed directly to the surface when not in use — royal icing skins and dries on contact with air.
The Science of Shape Retention
Cut-out cookies spread for one primary reason: the butter in the dough melts before the protein and starch structure can set around it. When butter is cold and solid, it holds the dough in place during the first critical minutes of baking. When butter is warm, it melts almost immediately, and the dough flows outward before the structure sets — destroying the cut shape.
This is why three techniques in this recipe work together to preserve shape:
- Cream cheese in the dough: Cream cheese has a lower water content than butter and a higher protein content. It acts as a mild structural binder within the dough, reducing the tendency to spread even before chilling. The Kitchn’s cream cheese cookie testing found that adding cream cheese to sugar cookie dough reduced spread by approximately 30% compared to a butter-only version at the same flour ratio.
- Higher flour ratio: This recipe uses 420g flour (3½ cups) rather than the 360g (3 cups) typical in drop cookies. The higher flour ratio creates a stiffer dough that is less prone to spreading. The tradeoff — a less tender cookie — is offset by the cream cheese and brown butter, which contribute tenderness and flavor respectively.
- Pre-bake chill of shaped cookies: Re-chilling cut shapes for 15 minutes on the pan before baking re-solidifies any butter that softened during rolling and cutting. When these cookies go into the oven, the butter starts from a colder, more solid state and takes longer to melt — by which time the protein and starch structure has had time to begin setting. The result is edges that hold their cutter-shape definition cleanly.
The Flavor Notes: Brown Butter, Vanilla Bean, and Almond
Brown butter
Brown butter in sugar cookies is less common than in chocolate chip cookies, partly because people assume the visual change will affect the cookie’s color. It does slightly — the cookies bake to a slightly warmer ivory rather than pure white. But the flavor payoff is significant: the Maillard compounds developed during browning add a nutty, caramel depth that prevents the cookie from tasting one-dimensionally sweet. When eaten plain, without icing, a brown butter sugar cookie tastes like something from a serious bakery. With icing, the flavor is subtle but detectable as a complexity behind the sweetness.
Vanilla bean paste vs. vanilla extract
Vanilla bean paste contains both vanilla extract and the actual seeds from vanilla pods. In a pale cookie where the visual appearance is scrutinized, the tiny black flecks of vanilla seeds visible in the baked cookie are a signal of quality — they communicate “made with real vanilla” before a single bite. Flavor-wise, the paste is slightly more intense and rounded than extract alone. The seeds are the same ratio as extract: 1½ teaspoons paste = 1½ teaspoons extract in terms of flavor contribution. King Arthur Baking’s vanilla comparison concluded that paste produces the most balanced, full-bodied vanilla flavor in baked goods where vanilla is a primary flavor — exactly the case in sugar cookies.
The almond extract question
Almond extract is divisive — people either love it or find it overwhelming. In this recipe at ½ teaspoon per batch (distributed across 18–24 cookies), it is present as a background note that makes the cookie taste “like sugar cookies” rather than just sweet butter and flour. Most people who think they don’t like almond extract actually don’t like too much almond extract. At ½ teaspoon, it reads as “bakery flavor” rather than “marzipan.” Do a test bake without it first if you’re uncertain — then taste the difference with the extract in the second batch. Most bakers who try both keep the extract permanently.
Royal icing drying times — plan your decorating session
Outline icing: 15–20 minutes to set enough to flood without bleeding
Flood icing surface: 30–60 minutes to set enough to add a second color on top without bleeding
Full dry for stacking: 6–8 hours at room temperature, or overnight
Speed tip: A fan placed near the decorated cookies reduces drying time by 30–40%. Do not use a hair dryer — the heat can crack the icing surface.
Holiday Color Guide for Royal Icing
| Color | Gel color to use | Notes |
|---|---|---|
| Classic white | No coloring (base icing) | Add 1 drop bright white gel for a cleaner white if icing looks ivory |
| Christmas red | Americolor Super Red | Red deepens as it dries — make slightly lighter than target; mix in advance and rest 30 min for truest color |
| Forest green | Americolor Forest Green | Avoid leaf green — it looks artificial on cookies; forest green is richer and more naturalistic |
| Gold / warm yellow | Americolor Gold or Lemon Yellow | True edible gold requires luster dust applied over dried icing, not gel coloring |
| Black (for details) | Americolor Super Black | True black requires a large amount of coloring and can affect taste at high quantities; use sparingly for outline details only |
Three Decorating Techniques, Ranked by Difficulty
1. Flood and sprinkle (beginner)
Outline the cookie with thick icing, flood with thin icing of the same or a contrasting color, and immediately apply sprinkles, sanding sugar, or edible glitter before the flood icing sets. No artistic skill required — the sprinkles provide the visual interest. Best for: simple shapes like stars, circles, and trees where a single decorated field is the goal.
2. Two-tone flooding with wet-on-wet detail (intermediate)
Flood the cookie with one color, then immediately pipe dots or lines of a contrasting color on top of the still-wet flood icing. Drag a toothpick through the dots to create hearts, feathering, or marbled effects. The two wet icings blend at their border, creating smooth, integrated designs. Requires practice but the technique is forgiving — imperfect results still look deliberate. Best for: ornament designs, snowflakes, gift boxes.
3. Layered detail work (advanced)
Allow the base flood layer to dry completely (6–8 hours), then add additional layers of outline-consistency icing to create raised details, dimensional elements, or fine linework. Each layer must be fully dry before the next is applied. This technique produces the kind of intricate, almost sculptural decorated cookies seen on professional decorating accounts. It requires patience more than talent — the drying time between layers is the main constraint. According to Food Network’s royal icing guide, room humidity dramatically affects drying time — in humid kitchens, allow 50% more time between layers.
Troubleshooting
| Problem | Likely cause | Fix |
|---|---|---|
| Cookies spread and lose shape | Shaped cookies not chilled before baking; dough too warm when cut | Chill cut shapes 15 min before baking; re-chill dough between rolling sessions |
| Dough tears when transferring | Rolled too thin or too warm; work surface not floured enough | Roll to 6mm minimum; use rolling pin guide rings; keep work surface lightly floured |
| Cookies too hard after baking | Overbaked; too much flour in dough | Pull when edges just set — before visible browning; weigh flour don’t measure by cup |
| Royal icing bleeds between colors | Flood icing too thin; second color applied before first dried | Thicken flood icing slightly; wait minimum 30 min between color layers |
| Icing surface cratered or bubbly | Air bubbles in flood icing; icing spread over a dusty or greasy surface | Pop bubbles with a toothpick immediately after flooding; ensure cookies are clean before icing |
| Icing too dark / color shifted | Many gel colors deepen as they dry (especially red) | Mix color lighter than target; test on a spoon and let dry before committing to the batch |
Storage — One of the Best Make-Ahead Holiday Cookies
Fully dried royal iced cookies are among the most shelf-stable decorated baked goods available. Once the icing is completely hard (overnight dry), the icing actually seals and protects the cookie beneath it, extending its shelf life significantly compared to an uniced cookie.
🗓️
Dough
Fridge: 3 days
Freezer: 3 months
Roll from chilled
🍪
Baked, undecorated
Room temp: 1 week
Freezer: 3 months
Ice after thawing
🎨
Fully iced and dry
Room temp: 2 weeks
Stack with parchment
Do not refrigerate
Frequently Asked Questions
Can I use buttercream instead of royal icing?
Yes, but it comes with tradeoffs. Buttercream tastes better than royal icing for most people. But it never fully dries, which means decorated cookies cannot be stacked, do not ship well, and have a shorter shelf life. For cookies you will serve the same day or the next day from a flat surface, buttercream is a fine choice. For anything involving storage, stacking, gifting, or shipping, royal icing is the right medium.
Can I freeze decorated cookies?
Royal iced cookies can be frozen, but the icing sometimes develops condensation spots as it thaws, which can cause colors to bleed slightly. For cookies where appearance is critical, freeze the baked uniced cookies and decorate after thawing. For cookies where minor appearance variation is acceptable, freeze fully decorated (with icing fully dried) in a single layer, then transfer to an airtight container. Thaw at room temperature in the container to minimize condensation.
Can I make the royal icing without meringue powder?
Yes — substitute 2 tablespoons of pasteurized dried egg whites (available online and at specialty stores) for the 3 tablespoons of meringue powder, or use 3 tablespoons of fresh pasteurized egg white. Fresh egg white royal icing has a shorter working time before it begins to skin, so work in smaller batches. Avoid fresh unpasteurized egg whites if serving to vulnerable populations (elderly, pregnant, immunocompromised).
My cookies came out perfectly shaped but taste dry — what went wrong?
Dry sugar cookies are almost always caused by one of three things: too much flour (most common — always weigh), overbaking (pull when edges are set but not golden), or rolling too thin (cookies below 5mm bake through very quickly and dry out). Check the flour weight first — a common measuring cup scoop can add 20–30% more flour than the recipe intends, which alone is enough to produce a dry cookie.
Continue reading — Seasonal Cookie Flavors
- Christmas Cookie Recipes: 10 Gourmet Flavors for Your Holiday Cookie Tray
- Gingerbread Cookie Recipe: The Thick, Soft Gourmet Version
- Peppermint Mocha Cookies: A Holiday Coffee-Shop Favorite at Home
- Eggnog Cookie Recipe: Capturing the Holiday Drink in Cookie Form
- ← Back to Seasonal Cookie Flavors: A Year-Round Baking Guide
Leave a Reply